Tutorial
This tutorial goes through a sample gene set association analysis covering all features of Seten browser user interface.
1. Select a file

Make sure you have a valid file or just pick one BED file from Sample datasets in the file option for analysis.
2. Select an organism and gene set collections
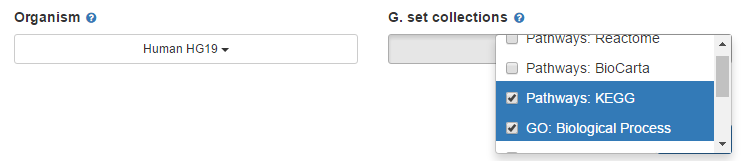
There are multiple organisms and multiple gene set collections available, just select the organism and gene set collections you are interested in.
3. Advanced parameters
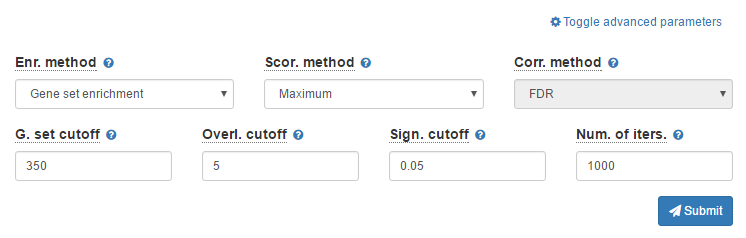
There are a number of parameters to customize the enrichment analysis. For this tutorial, you can keep them as default. These parameters are documented in the Documentation.
4. Start the analysis
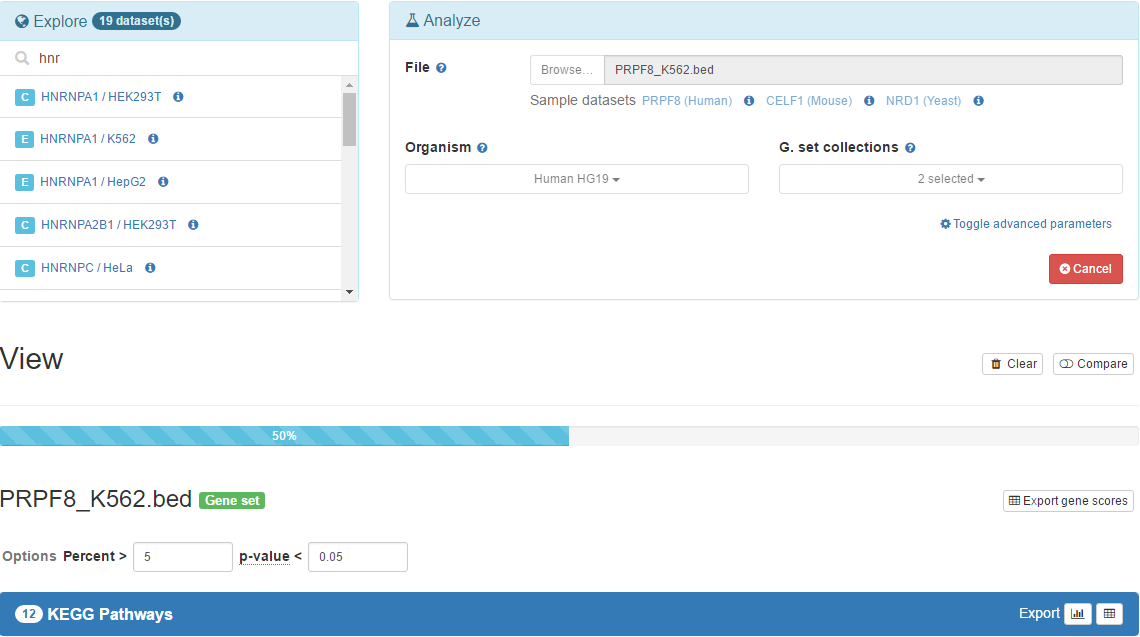
After selecting a BED file and gene set collections of interest, you can just click Submit button to start the analysis. After it starts, there will be a progress bar showing the progress of analyzing the dataset for each gene set collection. In the latest versions of modern browsers, the entire analysis may take up to several minutes depending on the number of gene set collections selected and number of cores available in your machine.
Note that the Analyze panel will be disabled during the analysis and the Submit button will be replaced with the Cancel button after it starts. You may click to this button, and later confirm to cancel the analysis.
5. View results
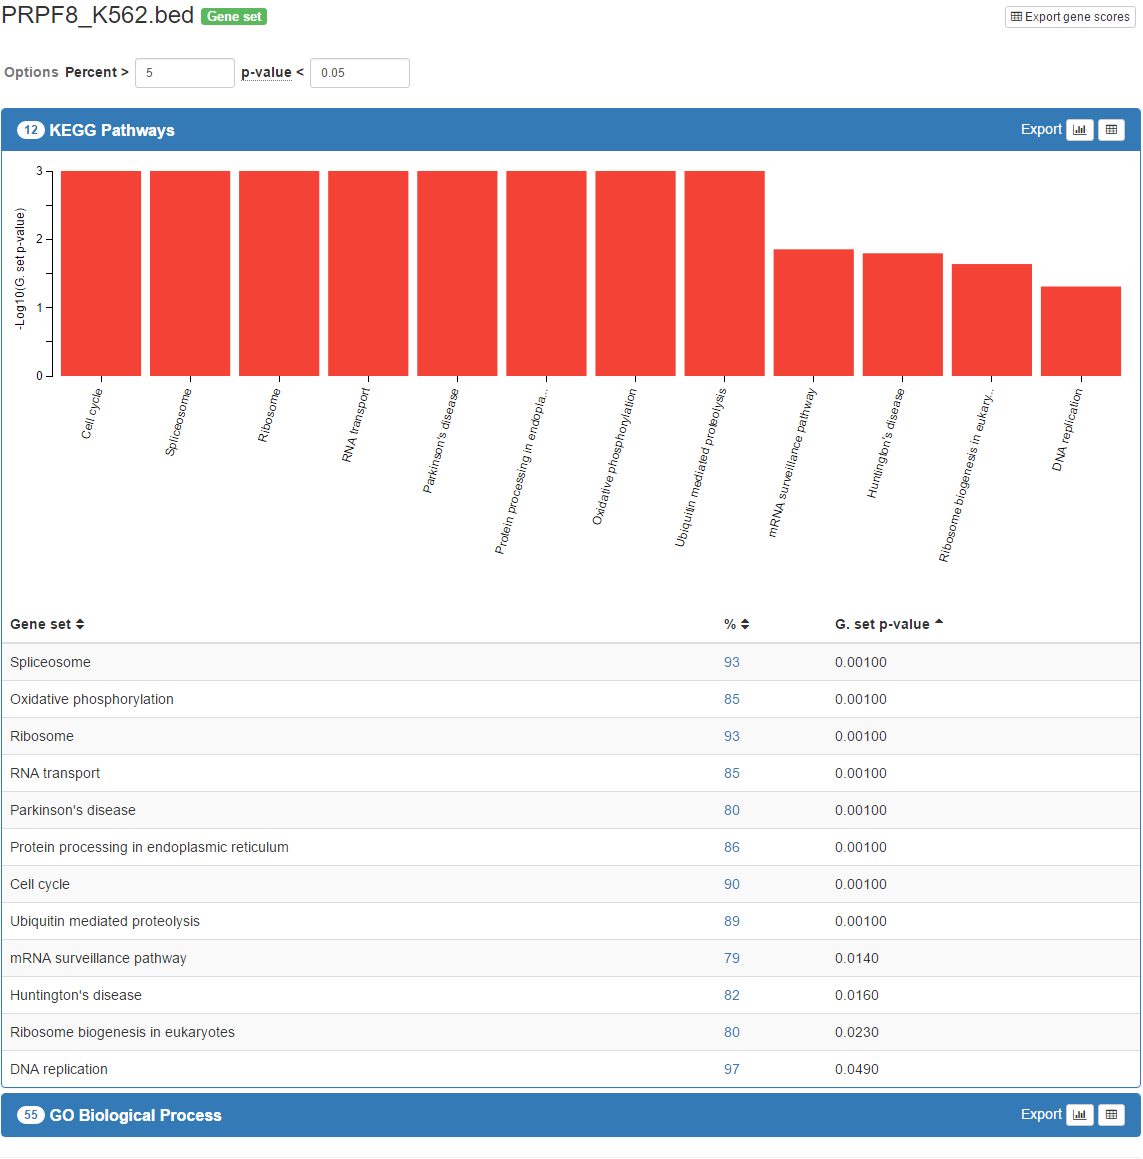
As the analysis goes on, the results that are complete will appear below the progress bar. You can click the name of the gene set collection in the result header to expand the view. After expanding it, for significant hits, you will see a bar chart and a table. The table is sortable and by default it is sorted by gene set p-value or corrected functional p-value in ascending order.
6. View overlapping genes per gene set
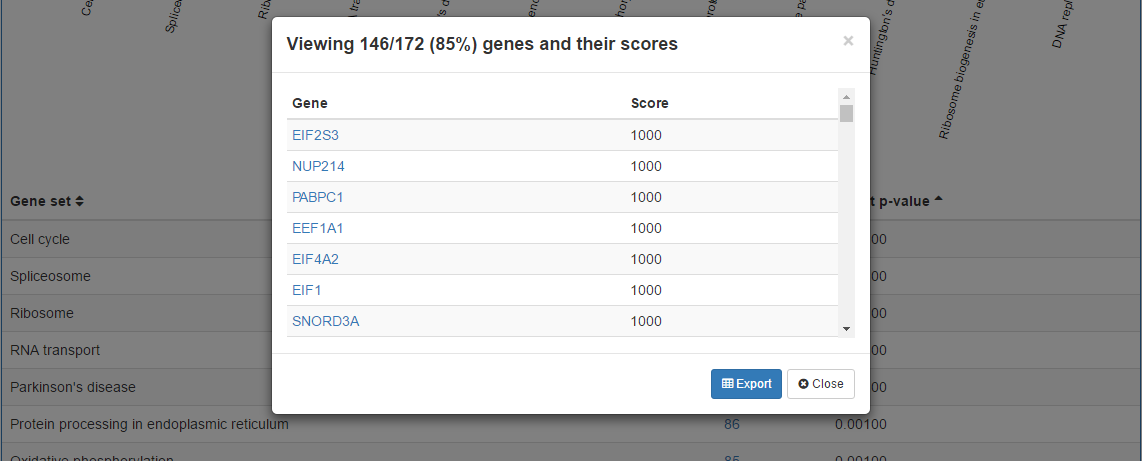
In the results table, each percentage value has a link to a pop up where the overlapping genes between the dataset given and corresponsing gene set are listed along with their scores that are used in the gene set enrichment analysis. Also, these genes are linked to their respective sources for further understanding.
The gene and scores in the pop up can be exported using the Export button on the pop up. Also, using Export gene scores button on the righthand side of the result title, it's possible to obtain scores for all distinct genes in the dataset.
7. Configure results

Just above the results, there will be a small form named Options which can be used to configure view based on precent and combined p-value thresholds. Change the default combined p-value threshold 0.05 to 0.01 and observe the results. You may have less number of gene sets available under this threshold. You may change the percent threshold as you wish.
8. Export results

Each result can be exported as a bar chart (SVG formatted) and a table (TSV formatted). Click the bar chart icon on the right of the result header. The bar chart will be downloaded to your computer. You may also click table icon next to it and download a local copy of the result table.
9. Compare results
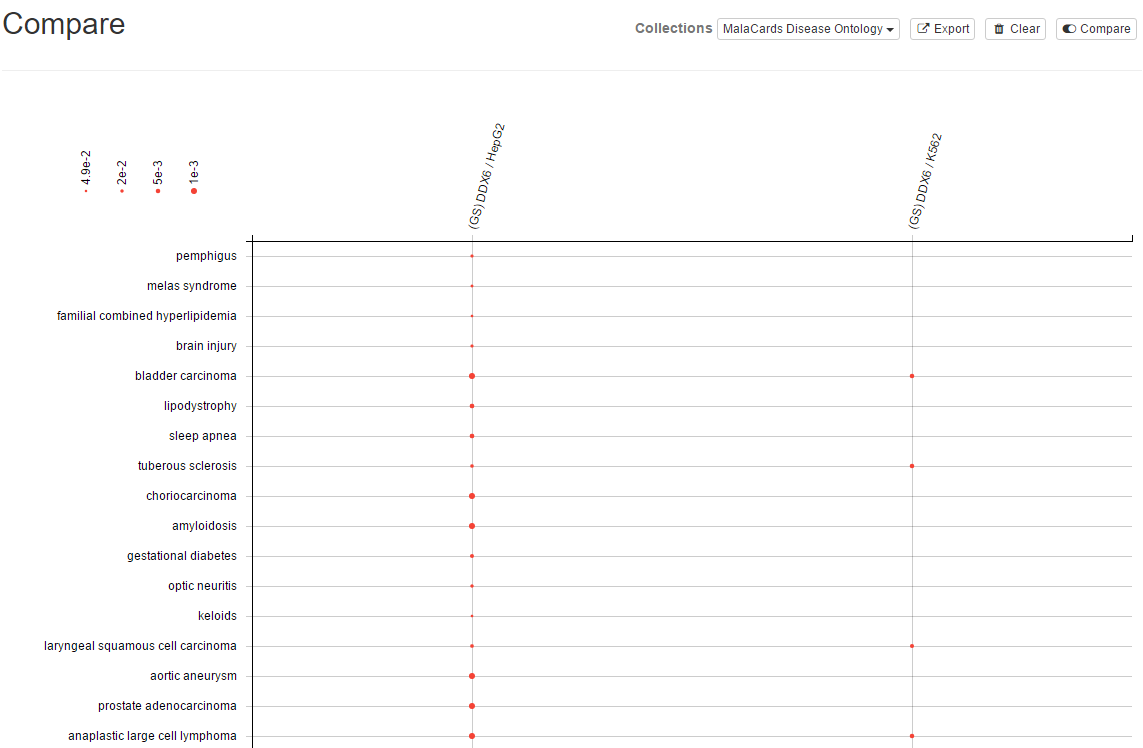
Using the Compare button, you can switch to another view where via a bubble chart you can compare multiple gene set association results you obtained from Explore and/or Analyze panels. Just click again to switch back to the previous view.
10. Explore available precomputed results
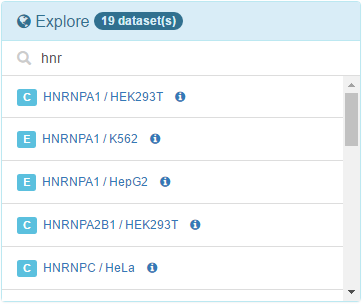
We are also providing precomputed gene set association results from CLIPdb and ENCODE project datasets. In Explore panel, you can click to any of the results to view, configure and export in the same way you did in the previous sections. It's a long list, so use search box to limit the list to the RBPs you may be interested in!